


An OBS filter changes the source it is attached to. A webcam filter affects the webcam image; a scene filter affects that scene’s combined picture. Within the Effect Filters list, processing runs from top to bottom. Placement determines what changes, while order determines what each effect receives.
This OBS filter guide focuses on video effects. For the full path from capture to output, start with how OBS works.
Choose what the filter should affect
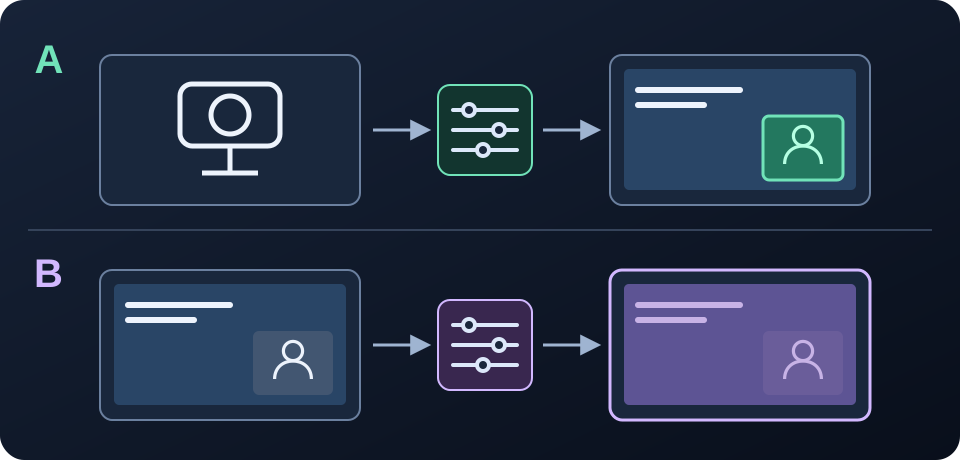
| Desired result | Attach the filter to | What else can change? |
|---|---|---|
| Adjust only your facecam | The webcam source | Everything in that camera image, depending on the effect |
| Grade the whole composition | The scene | Webcam, screen, images, and text in that scene |
| Apply an effect to a reusable camera layout | A dedicated nested scene | All content inside that nested scene |
A scene is itself a source that combines other sources, which is why it can have filters. The OBS Source API reference describes composite sources. A scene-level color effect does not know that your slides or logo should retain their original colors.
How does OBS filter order work?
Read the Effect Filters list from top to bottom: each later effect receives the result of the earlier effects. This describes the visible processing order, not the order of internal rendering calls. It follows from the filter chain and enumeration in OBS source processing and the list population in the OBS filter dialog.
Do not confuse this with the Sources panel: moving a source upward makes it appear in front of other sources. Moving an effect upward makes it process earlier in that effect stack. The separate Audio/Video Filters list is not one continuous stack with Effect Filters; this article does not prescribe audio-filter order.
Example: Chroma Key and a color LUT
Chroma Key removes a selected background color. A creative LUT can change that color before the keyer sees it. A useful starting point is Chroma Key → Apply LUT, then inspect hair edges and green spill. This is an explanation of the dependency, not a universal preset: correcting a poorly lit background before keying can require a different setup.
Example: Crop/Pad and an image mask
Crop/Pad changes the source area, while Image Mask/Blend uses an image to mask or blend the result. Cropping before a mask can change how that mask fits; cropping afterward cuts the already masked picture. Choose the frame you want, then compare both orders. Cropping a scene item in the preview is a separate layout operation, not a movable entry in the filter list.
Add and check a filter without losing your baseline
- Select the intended webcam source and open Filters from its context menu. Confirm the source name before editing.
- Under Effect Filters, add a built-in effect such as Color Correction. The official Filters Guide lists the available types and their purposes.
- Make one visible adjustment, then toggle that filter’s visibility to compare. Keep the camera, lighting, and scene unchanged during the comparison.
- If combining effects, use the reorder controls to move one effect at a time. Check the face, background, and any transparent edges.
- Make a short recording before going live. Keep notes or a screenshot of the original settings so you can restore the previous look.
For choosing between whole-image color correction and face-aware retouching, see OBS color correction versus beauty filters.
Why does one OBS filter change multiple scenes?
Add Existing reuses the same source rather than creating independent filter settings. If several scenes reference one webcam source, editing that source’s filter changes its image wherever it is used. Each scene item can still have its own position, size, and layout crop.
For a different look in one scene, create a dedicated scene containing the existing webcam, add that scene as a source in your main scene, and apply the extra effect to the dedicated scene. Keep titles and screen content outside it. Use a different wrapper scene for each independent look; reusing the same wrapper also shares its filters. Filters already on the underlying webcam still affect every wrapper. Avoid opening the physical webcam again just to isolate an effect.
Where does CiCi beauty processing fit in OBS?
With CiCi OBS Plugin, select the intended camera source and use Apply Cici to attach the beauty filter. Follow the plugin installation guide for the actual workflow; the plugin page lists availability and plans. Start with the camera source rather than the entire composition when the goal is facecam retouching.
With the CiCi Cam desktop app, beauty processing happens before its virtual camera enters OBS. Reordering OBS filters cannot move an effect ahead of processing that already happened in CiCi Cam. Use the virtual camera setup guide for that route. Avoid unintentionally stacking the same beauty adjustment in both products; compare transparency and face tracking when combining third-party effects instead of assuming one order always works.
Troubleshoot by checking scope, order, and load
| Symptom | First check |
|---|---|
| Text or slides change color with your face | Is the filter on the scene instead of the webcam? |
| Another scene changes unexpectedly | Does it reference the same source or nested scene? |
| A mask or green-screen edge breaks | Did an earlier filter change color, dimensions, or transparency? |
| The effect does nothing | Correct source, enabled filter, and any plugin activation requirements |
| The preview starts stuttering | Disable effects individually and watch rendering statistics |
Filters consume resources even with hardware encoding. The OBS performance guide recommends reducing expensive filters and applying them to smaller sources where appropriate. A webcam filter is not automatically faster in every setup; resolution, effect implementation, and other GPU work matter. For a fuller diagnosis, see beauty filter lagging.
Frequently asked questions
Should I disable a filter or delete it?
Disable it first when comparing results. That lets you keep its settings while checking whether it causes the problem. Delete it when you no longer need it, after saving any settings you want to reuse.
Is there one best OBS filter order for every webcam?
No. A keyer depends on background color, a mask depends on geometry and transparency, and a face-tracking plugin needs a usable face image. Build the shortest chain that achieves your goal and check each change in your actual scene.
Sources and review scope
Reviewed on 2026-10-28 using the official OBS guides and source code linked above. Continue with the OBS streaming guides for setup and application-specific tutorials.